Okay, so the other day I had this brilliant idea to move my laundry room upstairs. Makes sense, right? No more hauling baskets up and down the stairs. But, there was this one big snag – figuring out the dryer vent.
The old setup had the vent going straight out the side of the house, super simple. But the new spot? It was smack-dab in the middle of the house. So, I had to get creative and figure out how to vent the thing vertically, up through the roof.
Planning the Route
First things first, I grabbed a measuring tape and started figuring out the path. I needed to go from the dryer, up through the ceiling of the laundry room, into the attic, and then out through the roof.
- Measured the distance from the dryer to the ceiling.
- Checked the attic space to make sure there was a clear path – no wires or pipes in the way.
- Figured out the total length of venting I’d need.
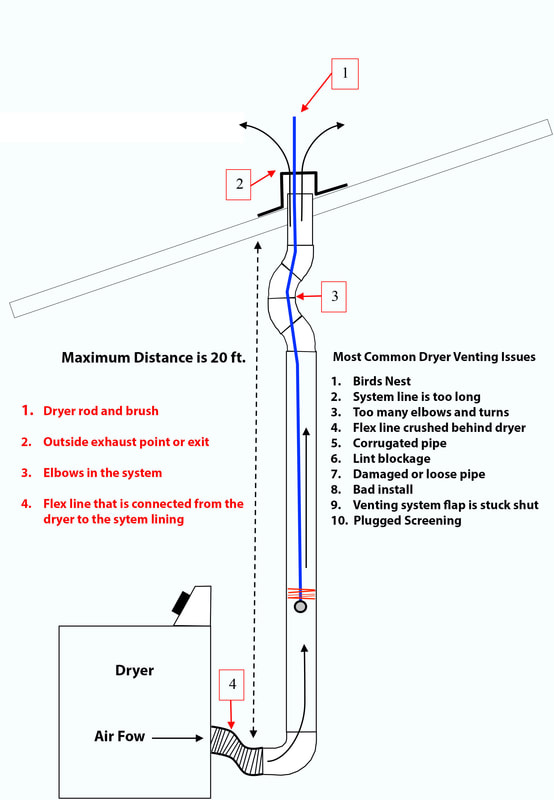
Important note: I made sure to keep the run as straight as possible. Every bend and turn adds resistance, and you don’t want your dryer working overtime.
Gathering Supplies
Next, I made a trip to the home improvement store. Here’s what I picked up:
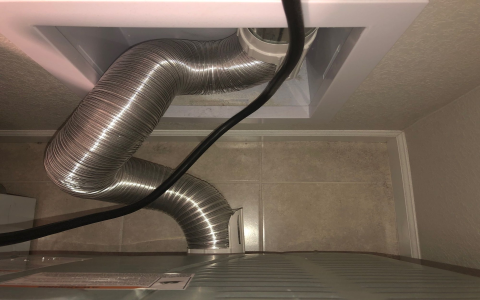
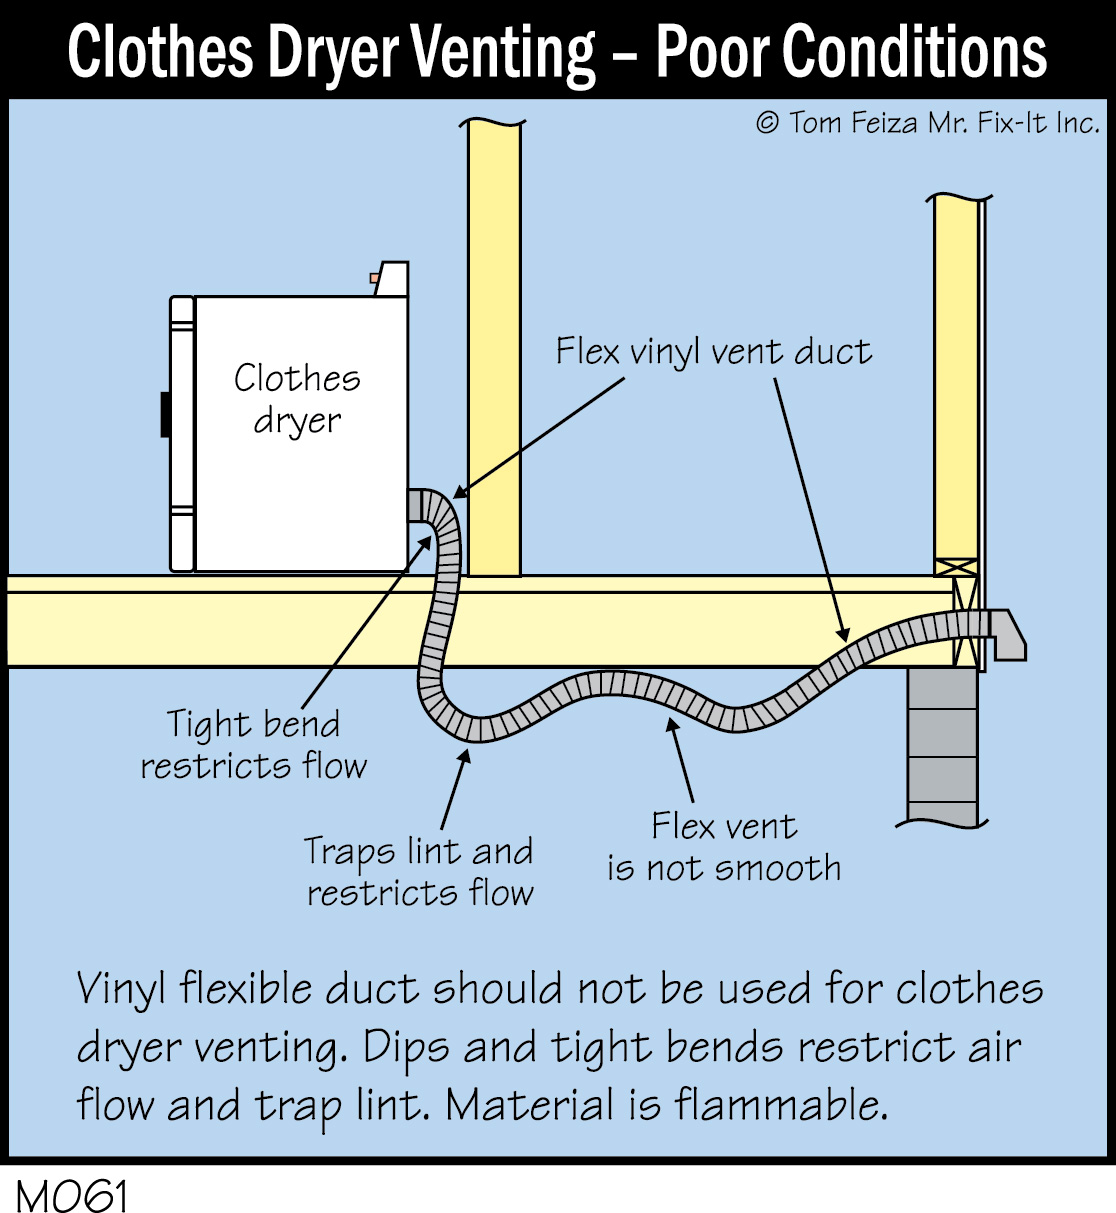
- Rigid metal ductwork – the smooth kind, not the flimsy flexible stuff.
- Elbow joints – just in case I needed to make any slight turns.
- Foil tape – to seal all the connections.
- A roof vent cap – specifically designed for dryers.
- Some screws and brackets to secure everything.
The Dirty Work
With everything gathered, it was time to get down to business. I started by cutting a hole in the ceiling, directly above where the dryer would sit. I used a drywall saw and made sure to wear safety glasses – drywall dust is nasty stuff.
Then, I assembled the ductwork, starting from the dryer and working my way up. Connecting the pieces was pretty straightforward, just sliding them together and sealing the seams with the foil tape. Make sure those seams are tight! You don’t want any lint escaping and causing a fire hazard.
Once I got the ductwork into the attic, I secured it to the rafters with brackets. This keeps it from moving around and potentially coming apart.
The Roof
This was the trickiest part. I carefully cut a hole in the roof, making sure it was the right size for the vent cap. I used a reciprocating saw for this, and let me tell you, being up on the roof is a bit nerve-wracking! I made sure that when it came to the roof and vent cap, everything was flush, level, and sturdy.
I installed the roof vent cap, following the manufacturer’s instructions. It’s important to seal around the edges with roofing sealant to prevent any leaks. Nobody wants rainwater dripping into their attic.
Final Steps
Back inside, I connected the final piece of ductwork to the dryer and secured it with foil tape. I gave everything one last check to make sure all the connections were solid and there were no gaps.
Finally, I ran the dryer for a few minutes and checked for any leaks or airflow issues. Everything seemed to be working perfectly! The air was flowing smoothly, and the lint was being vented outside, just like it should.
All in all, it was a bit of a project, but totally doable. And now, I can do laundry without breaking my back carrying it up and down the stairs. Success!