Alright, folks, gather ’round! Today, I’m gonna walk you through my little adventure of wrapping my car with vinyl. It’s something I’d been thinking about for a while, and I finally took the plunge. Let me tell you, it was a learning experience!
Getting Started
First things first, I picked my color. I went with a matte metallic blue – pretty slick, if I do say so myself. Then, I ordered a big roll of vinyl, enough to cover my whole car with some extra for mistakes (and trust me, there were mistakes!).
Before I even touched the vinyl, I gave my car the most thorough wash it’s ever had. I’m talking soap, water, the whole nine yards. Then I went over it with a clay bar to get rid of any tiny bits of dirt or grime. A clean surface is key for the vinyl to stick properly.
The Wrapping Process
Okay, this is where things got interesting. I started with the hood, figuring it was a relatively flat surface to practice on. I laid the vinyl over the hood, leaving plenty of overhang on all sides.
- I used a heat gun (basically a super-powered hairdryer) to make the vinyl more flexible.
- Then, with a squeegee, I slowly started smoothing the vinyl onto the hood, working from the center outwards.
- The key is to go slow and use plenty of heat, especially on curves and edges.
It wasn’t easy. I ended up with a few bubbles and wrinkles at first, but I learned to use the heat gun to lift the vinyl and try again. Patience is definitely a virtue with this stuff.
After the hood, I moved on to the doors, the fenders, and finally the roof. Each panel presented its own challenges, but I gradually got the hang of it. I’m not gonna lie, there were moments of frustration, but I kept pushing through.
Trimming and Finishing
Once the vinyl was on, I used a sharp blade to carefully trim the excess around the edges of each panel. This part was nerve-wracking because one slip and you could scratch your paint. I took my time and went slowly, and thankfully, no major mishaps!
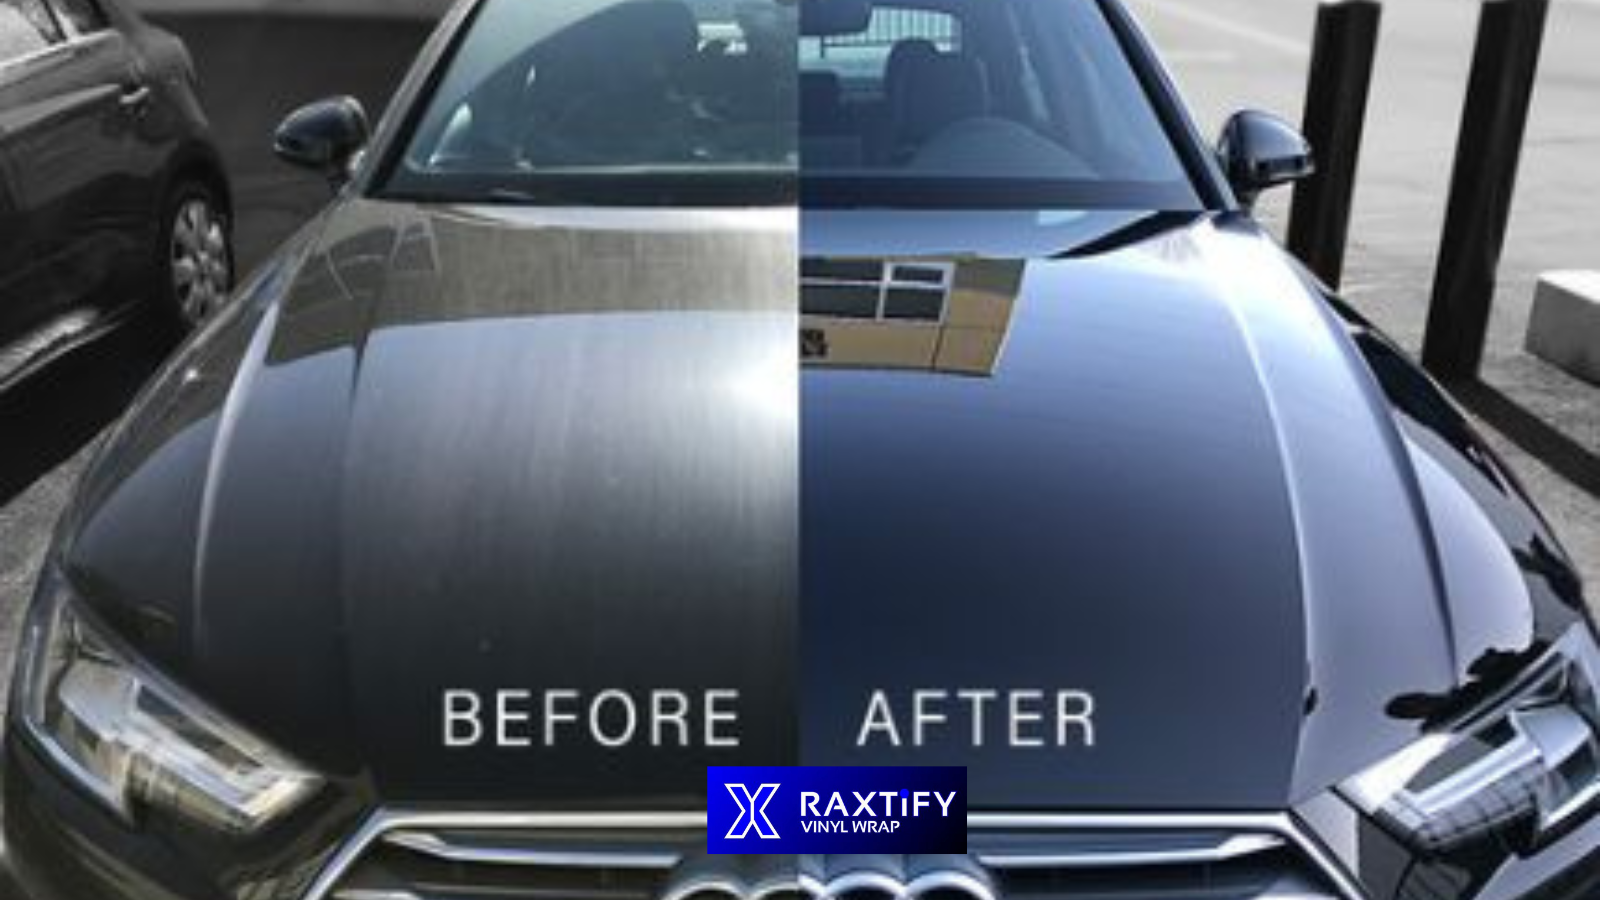
The Result
After several days of work, I finally finished! And honestly, it looked pretty darn good. The matte metallic blue completely transformed the look of my car. It was like driving a brand new vehicle.
Was it perfect? Nope. There were a few tiny imperfections here and there, but overall, I was super happy with how it turned out. It was a challenging project, but definitely rewarding. Plus, I saved a ton of money by doing it myself instead of paying a professional.
So, that’s my vinyl wrap story! If you’re thinking about doing it yourself, my advice is to do your research, be patient, and don’t be afraid to make mistakes. It’s all part of the learning process!