Okay, so I wanted to capture that classic “Rainier View Water” shot, you know, the one everyone wants when they visit Washington. I figured I’d share my little adventure and what I did to get it. It wasn’t as simple as just showing up!
Planning the Trip
First, I spent some time looking at maps. I knew I wanted Mount Rainier in the background and some water in the foreground. There are a bunch of lakes and, of course, Puget Sound. I decided to check out a few spots I’d heard good things about, places like Discovery Park or maybe even heading down towards Tacoma.
- Researched locations online.
- Checked the weather forecast (super important in the Pacific Northwest!).
- Packed my camera gear, extra batteries, and some snacks.
The Scouting Mission
So, the first day I drove out to Discovery Park. I walked around, explored the trails, and tried a few different vantage points. The view of the Sound was great, but Rainier was hiding behind some clouds. Typical!
The next day, I headed south. I stopped at a couple of smaller parks along the way, just to see what I could see. I even pulled over on the side of the road a few times when I spotted a promising view.
Finding “The Spot”
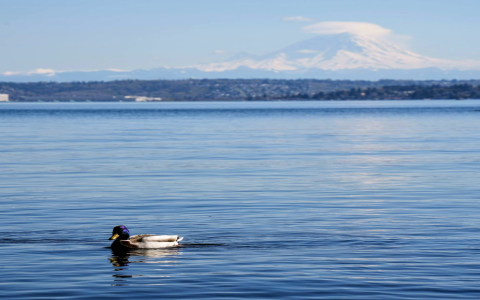
Finally, I found this little park near Gig Harbor. It wasn’t anything fancy, just a small grassy area with a few benches overlooking the water. But the view? Amazing! Rainier was perfectly framed by the trees, and the water was calm and reflective.
I waited around, took a picture, it’s perfect!
The Final Result
I ended up with a bunch of shots, some better than others. The light changed throughout the afternoon, which gave me some different options. I played around with my camera settings, experimented with different angles, and just enjoyed the process.
It was great!