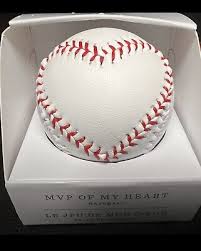
Okay, so the other day I got this idea to try and make a baseball with a heart stitch design. I’d seen some cool embroidery projects online and thought, “Why not combine that with my love for baseball?” So, I decided to give it a shot.
Getting Started
First, I gathered all my materials. I already had an old baseball lying around. Then I grabbed some:

- Red embroidery floss (the thick kind)
- A sturdy needle – one that could handle going through the baseball’s leather.
- Scissors.
The Process
I started by lightly sketching a heart shape onto the baseball with a pencil.I made sure the heart fit nicely between the existing baseball stitches. I erased and redrew it a few times until I was happy with the size and placement.
Next, I threaded my needle with a long piece of the red floss. I knotted the end a couple of times to make sure it wouldn’t pull through. Then came the tricky part – actually stitching!
I pushed the needle through the leather from the inside of the heart shape, working my way along the pencil outline. I made each stitch fairly small and close together, and the leather was tough, so I really had to push that needle through! I kept going, following the heart outline, pulling the floss tight with each stitch. It took a while, and my fingers got a little sore, but I persevered.
Finishing Up
Once I completed the heart outline, I tied off the floss on the inside of the shape with a few secure knots. I snipped the excess floss, making sure to leave a little bit so the knots wouldn’t unravel.
And there it was! My very own heart-stitched baseball. It wasn’t perfect, of course. Some stitches were a little uneven, but I was still pretty proud of it. It’s a unique little piece, and it was fun to make something with my own hands.