Okay, so I got into this whole 3D printing thing a while back, and let me tell you, it’s been a wild ride. I’ve printed all sorts of silly stuff, but this time, I decided to make a duck. Yeah, a simple, classic rubber ducky, but 3D printed.
Getting Started
First things first, I needed a 3D model. I’m no artist, so I hopped online and found a free one. There are tons of websites out there with free models, it’s crazy! I downloaded the .STL file – that’s the file type most 3D printers use.
Slicing It Up
Next, I had to “slice” the model. Basically, this means turning that 3D model into a bunch of super-thin layers that the printer can understand. I used this software, Cura, it is pretty common for 3D printing. I loaded the duck model into it, played around with some settings – things like layer height, print speed, and infill (how solid the inside of the duck is). I went with a pretty standard setup, nothing fancy.
Printing Time!
With the model sliced and saved onto an SD card, I popped it into my 3D printer. I made sure the print bed was level – this is super important, or your print will mess up. Then, I hit “print” and watched the magic happen. Or, you know, the slow, methodical layering of plastic. It’s not exactly instant gratification, but it’s still pretty cool to watch.
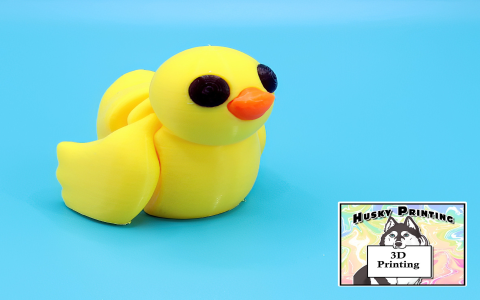
My printer use PLA, one of the mateirals can be used for printing, and I choose yellow, the classic color for a duck!
The Waiting Game
This little duck took a few hours to print. It’s not a huge print, but 3D printing takes time. I just let it do its thing, checking in every now and then to make sure nothing was going wrong. Sometimes the filament can get tangled, or the print can come loose from the bed – it’s a whole thing. But this time, everything went smoothly.
The Finished Product!
- Success! The printer beeped, and there it was – a bright yellow, plastic duck.
- Support Removal: There are few support structures from the slicing setting, It’s easy to remove them with a small tool.
- Looking Good: It’s not perfect, there are a few little imperfections, but overall, I’m pretty happy with it. It’s a duck! I made a duck!
It is fun, and I will try to make a bigger one next time!